

How to Get Surfer Hair That Looks Naturally Wavy
How to Get Surfer Hair?

Content
Content
Surfer hair isn't just a hairstyle. It's a whole vibe — relaxed, sun-kissed, and effortlessly textured in a way that looks like the ocean did all the work. The reality? Getting that look takes a bit of know-how, the right products, and a few techniques that most guys skip entirely. Whether you're starting from scratch or trying to refine what you've already got, this guide covers everything you need to pull it off properly.
What Surfer Hair Actually Looks Like
The surfer hair aesthetic is built on three things: texture, movement, and a slightly undone finish. Think loose waves that don't look styled, volume that isn't stiff, and a salt-tousled surface that catches the light. It's not messy in a neglected way — it's messy in a very specific, controlled way.
The look typically sits somewhere between damp and dry. Hair that's fully dried and brushed out loses the wave definition that makes the style work. Hair that's still wet looks heavy and flat. The sweet spot is that in-between state where waves are set but the hair still has a natural bounce to it.
Color plays a role too. Sun-bleached tips, natural highlights, or just a slightly faded shade all reinforce the aesthetic. But color isn't required — the texture is what carries the look.
The foundation of the style is sea salt texture. Salt draws moisture out of the hair shaft, roughing up the cuticle slightly and creating that grip and definition that makes waves hold their shape. That's why salt spray is the single most-used product in this category, and why the look is so hard to fake with regular styling products alone.
Which Hair Types Work Best for the Surfer Look
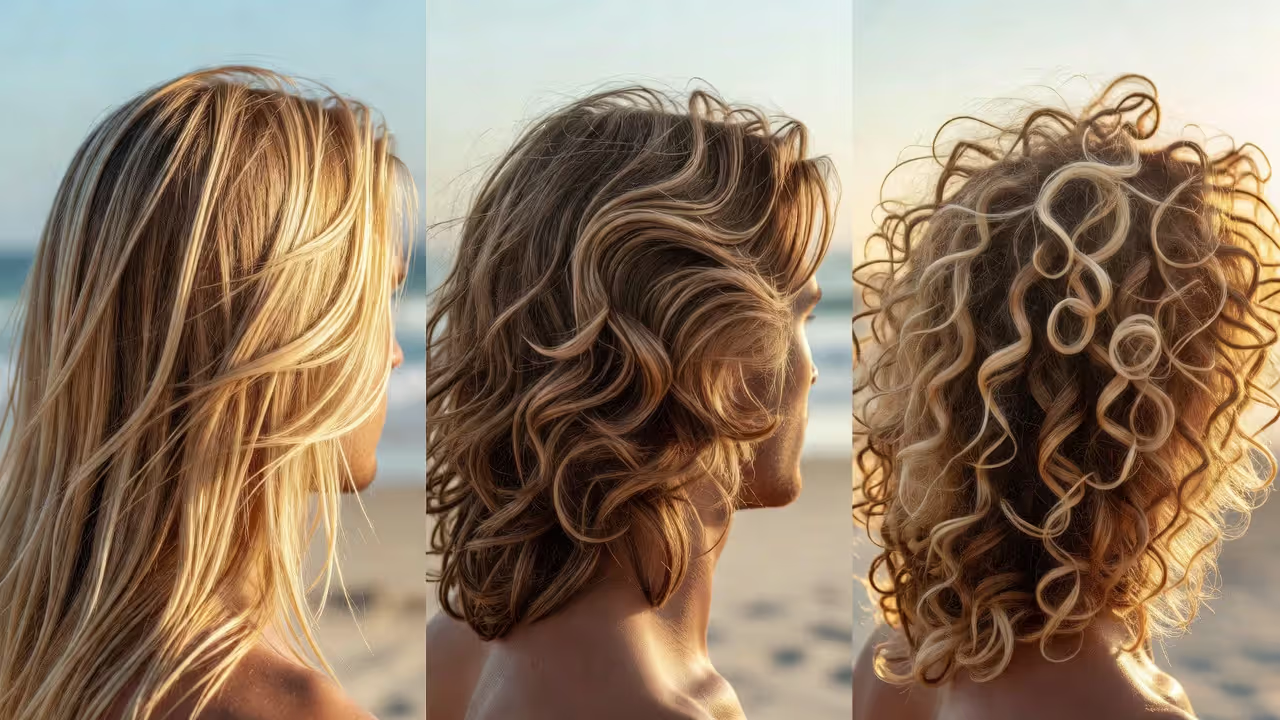
Not every hair type gets there the same way. Straight hair needs more work. Wavy hair gets there fastest. Curly hair needs some taming. But all three can pull it off — the approach just shifts.
Straight Hair
Straight hair is the hardest starting point, but it's not a dead end. The key is adding texture before it dries. Salt spray on damp hair, followed by scrunching and air drying (or diffusing), can coax some wave into straight strands. A perm or wave treatment is another option if you want a more permanent base to work with. Without some kind of texture-building step, straight hair will just dry flat no matter what you spray on it.
Naturally Wavy or Curly Hair
Author: Julian Crestwell;
Source: juneoils.com
Naturally wavy hair is the ideal canvas. It responds to salt spray immediately, holds waves without much effort, and dries into exactly the kind of shape the style calls for. Curly hair works too, but the goal is to loosen the curl pattern rather than define it — lighter products and less scrunching help keep it from going too tight.
Surfer Hair by Hair Type — What to Expect
| Hair Type | Difficulty | Recommended Technique | Key Product | Styling Time |
| Straight | High | Salt spray + scrunch + diffuse | Texturizing salt spray | 20–30 min |
| Wavy | Low | Salt spray + air dry | Light salt spray or cream | 10–15 min |
| Curly | Medium | Rake through, air dry, minimal scrunch | Texturizing cream or light wax | 15–20 min |
How to Style Wavy Surfer Hair Step by Step
This is where most guys either get it right or completely blow it. The process matters as much as the products.
Author: Julian Crestwell;
Source: juneoils.com
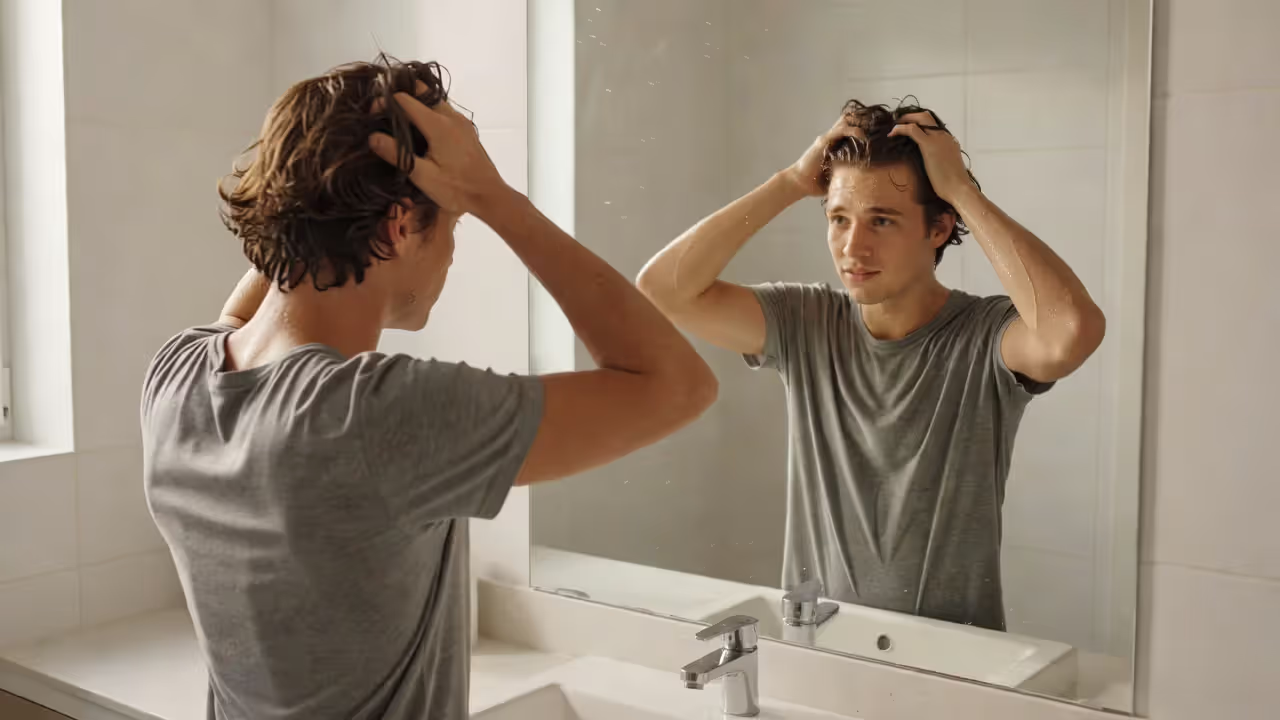
Start with freshly washed, towel-dried hair. Not soaking wet — you want the hair damp, not dripping. Squeeze out excess water with a towel, but don't rub. Rubbing roughens the cuticle unevenly and creates frizz instead of texture.
Apply your salt spray while the hair is still damp. Work it through from mid-shaft to ends — roots don't need much. Use your fingers to scrunch sections upward toward the scalp. That scrunching motion is what encourages the wave to form. Don't comb it, don't brush it, don't smooth it out.
From there, you've got two options: air dry or diffuse. Air drying gives the most natural result but takes longer — 30 to 45 minutes depending on thickness. Diffusing with a blow dryer on low heat speeds things up and adds volume, but you need to keep the diffuser moving and keep the heat low. Holding it in one spot for too long creates frizz.
The whole point of surfer hair is that it looks like you did nothing — but you absolutely did something.
— Townsend Mark
Once the hair is about 80% dry, do one final scrunch-and-release to break up any crunchiness from the salt spray. That's it. Don't touch it more than that. The pattern I see most often is guys over-handling their hair right at the end and undoing all the wave they just built.
Popular Surfer Hairstyles for Guys
The surfer look isn't one single cut. There are a few variations that work well depending on your face shape and how much length you want to commit to.
The medium shag is probably the most popular right now. It sits around jaw to chin length, has layers throughout, and moves easily. It works on most face shapes and is forgiving with different hair types. If you want one cut that covers the most ground, this is it.
Curtain fringe is a shorter take — think mid-length hair parted loosely in the middle with the fringe falling to either side. It reads as surfer without requiring a ton of length. It suits oval and heart-shaped faces particularly well.
Longer layered styles — anything past the chin, sometimes hitting the shoulders — lean into the full beach aesthetic. This works best for guys with naturally wavy or slightly curly hair, since the length pulls the wave into a more defined shape. Straight-haired guys at this length tend to fight the flatness more.
The common thread across all of these is layers. Blunt cuts don't move the same way, and movement is the whole point of messy beachy hair for men.

Author: Julian Crestwell;
Source: juneoils.com
Products That Create the Beachy Texture
Salt spray is the backbone. It mimics what actual saltwater does to hair — adds grip, roughens the surface slightly, and helps waves hold their shape. Brands like Not Your Mother's Curl Talk, Bumble and bumble Surf Spray, or even a simple DIY mix of sea salt and water all work. You don't need to spend a lot here.
Texturizing creams are the second tool. They add definition without the crunch that salt spray can sometimes leave behind. Apply a small amount — dime-sized — after the salt spray if you want more control over individual waves.
Light hold waxes or pomades can finish the look and separate pieces for a slightly more styled take. The key word is light. Heavy wax kills movement, and movement is the whole point.
What to avoid: heavy gels, strong-hold pomades, and anything that promises "sleek" or "smooth." Those products are the opposite of what you're going for. They lock the hair in place and flatten the texture you just worked to build. One common mistake is reaching for a product that "worked great for a different style" — if it's not designed for texture and movement, leave it out.
How to Maintain Surfer Hair Without Damaging It
Washing frequency matters more than most guys think. Washing every day strips the natural oils that give hair its flexibility and wave-holding ability. Two to three times a week is the sweet spot for most hair types. On off days, a quick rinse with water and a light scrunch with salt spray refreshes the look without stripping anything.
Deep conditioning once a week keeps the hair from drying out — especially if you're using salt spray regularly or spending time in actual saltwater. Salt is dehydrating, and dry hair breaks more easily and loses its elasticity.
UV protection is underrated. The sun bleaches hair and degrades the protein structure over time. A leave-in conditioner with UV filters, or even just wearing a hat on long beach days, makes a real difference in how your hair holds up across a season.
Trim every 8 to 10 weeks. Layers need maintenance to keep their shape, and split ends travel up the shaft faster in hair that's regularly exposed to salt and sun. A small trim keeps the style looking intentional rather than just grown out.
Common Mistakes That Kill the Surfer Hair Look
Over-brushing is the fastest way to destroy the look. A brush separates and smooths every wave you just built. Use your fingers instead — always.
Wrong product order is another common issue. Salt spray goes on damp hair, before drying. Applying it to dry hair doesn't activate the same way and just makes the hair feel gritty without adding real texture.
Blow-drying without a diffuser blasts the hair with concentrated airflow that disrupts the wave pattern and creates frizz. A diffuser attachment spreads the airflow and lets waves dry in their natural shape. It's a small thing that makes a significant difference.
Skipping heat protection when you do use heat is a mistake that adds up over time. A lightweight heat protectant spray before diffusing keeps the hair from getting brittle, which matters especially if you're styling frequently.
And finally — over-applying product. More salt spray doesn't mean more wave. It usually means more crunch and less movement. Start with less than you think you need, see how the hair responds, and add from there.

Author: Julian Crestwell;
Source: juneoils.com
FAQ: Surfer Hair Questions Answered
Getting surfer hair right comes down to working with your natural texture instead of fighting it, choosing products that build movement rather than lock it down, and knowing when to stop touching your hair. The less you overthink it, the better the result tends to look — which, honestly, is kind of the whole point.
Related Stories

Read more
Read more



The content on this website is provided for general informational and educational purposes only. It is intended to explain concepts related to cosmetology, hair care, skincare, aesthetic treatments, and beauty procedures.
All information on this website, including articles, guides, and examples, is presented for general educational purposes. Results may vary depending on individual skin type, hair type, or treatment protocols.
This website does not provide professional medical, dermatological, or cosmetic services, and the information presented should not be used as a substitute for consultation with licensed aestheticians, dermatologists, or medical professionals.
The website and its authors are not responsible for any errors or omissions, or for any outcomes resulting from decisions made based on the information provided on this website.